The Hidden Architecture of Efficient Cleaning: Why Storage Matters
The modern vacuum cleaner is a marvel of engineering, but its true potential is often locked away in a chaotic jumble of plastic nozzles, horsehair brushes, and extension wands. If you have ever reached for a crevice tool only to find it buried under a mountain of winter coats or, worse, missing entirely, you understand the fundamental friction that derails a productive cleaning session. To store vacuum attachments effectively is not merely an act of tidying; it is the implementation of a high-performance workflow.
When we talk about vacuum attachment storage, we are addressing the bridge between "owning a tool" and "using a tool." Professional cleaners and organizational experts know that if a tool is not accessible within five seconds, the likelihood of it being used drops by over 60%. This leads to a common phenomenon where homeowners only perform "surface cleaning"—vacuuming the open floor—while the corners, upholstery, and delicate moldings accumulate dust and allergens because the necessary attachments were too much of a "hassle" to retrieve.
Properly organizing these accessories transforms your vacuum from a floor-care device into a comprehensive home maintenance system. We are currently in an era where vacuum technology has peaked, with HEPA filtration and high-torque motors becoming standard. However, the storage of the accompanying toolkit remains the final frontier for most households. Whether you are managing a high-end cordless stick vacuum with specialized pet power brushes or a heavy-duty shop vac with industrial-sized nozzles, the principles of professional-grade organization remain the same.
In this mega-guide, we will dismantle the "throw it in a box" mentality and replace it with a strategic framework for vacuum attachment storage. We will explore the physics of space, the psychology of accessibility, and the practical hardware required to turn your utility closet into a command center. By the end of this deep dive, you will not only know where your dusting brush is, but you will also have a system that protects your investment and slashes your cleaning time in half.
The Critical Problem: The Chaos of the Accessory Abyss
The average high-end vacuum cleaner comes with between five and twelve specialized attachments. From the motorized mini-tool for stairs to the flexible radiator brush, these components are designed for specific geometries. Yet, the industry-standard solution for storing these items is often non-existent or woefully inadequate. Most manufacturers provide a "on-board" storage clip that holds perhaps two tools, leaving the rest to drift into the "accessory abyss."
This lack of structural organization creates a three-fold crisis for the homeowner: mechanical degradation, hygiene compromise, and cognitive load.
1. Mechanical Degradation and Structural Fatigue
Vacuum attachments are largely constructed from ABS plastic and various synthetic or natural bristles. When these tools are tossed into a bin or a drawer, they are subjected to "bristle splay." This occurs when the weight of one tool rests on the bristles of another, permanently deforming them and rendering the tool ineffective for agitation. Furthermore, the "friction-fit" or "click-fit" connectors on these tools are precision-engineered. When they are knocked around in a disorganized pile, these connectors can develop micro-cracks or burrs, leading to air leaks that significantly reduce suction power at the point of contact.
2. The Hygiene Paradox
We use vacuums to remove filth, yet the way we store vacuum attachments often turns them into reservoirs for the very dust we seek to eliminate. A crevice tool that has been used to clean a sliding door track is covered in outdoor particulate and moisture. If it is immediately thrown into a dark, unventilated drawer with other tools, it becomes a breeding ground for dust mites and mildew. Without a storage system that allows for airflow and separation, you are essentially cross-contaminating your home every time you switch attachments.
3. The Cognitive Friction of Cleaning
The most significant cost of poor vacuum attachment storage is psychological. Cleaning is a task that many people already find burdensome. When you add the "search cost" of finding the right tool, the brain perceives the task as twice as difficult. This cognitive load leads to "avoidance behavior." You see the dust on the ceiling fan, but because you don't know exactly where the long-reach dusting brush is, you decide to "do it next time." Over months, this leads to a significant decline in indoor air quality and home maintenance standards.
Expert analysis suggests that a disorganized vacuum setup can add up to 15 minutes of "dead time" to a standard weekly cleaning routine. Over a year, that is 13 hours wasted simply looking for pieces of plastic. To solve this, we must move beyond the "junk drawer" approach and adopt a methodology rooted in visibility and accessibility.
Methodology & Core Guide: Strategic Organization Systems
To master vacuum attachment storage, you must choose a system that aligns with your home's footprint and your specific vacuum type. There is no one-size-fits-all solution, but there are three primary methodologies used by professional organizers: Vertical Integration, The Mobile Caddy System, and The Modular Bin Approach.
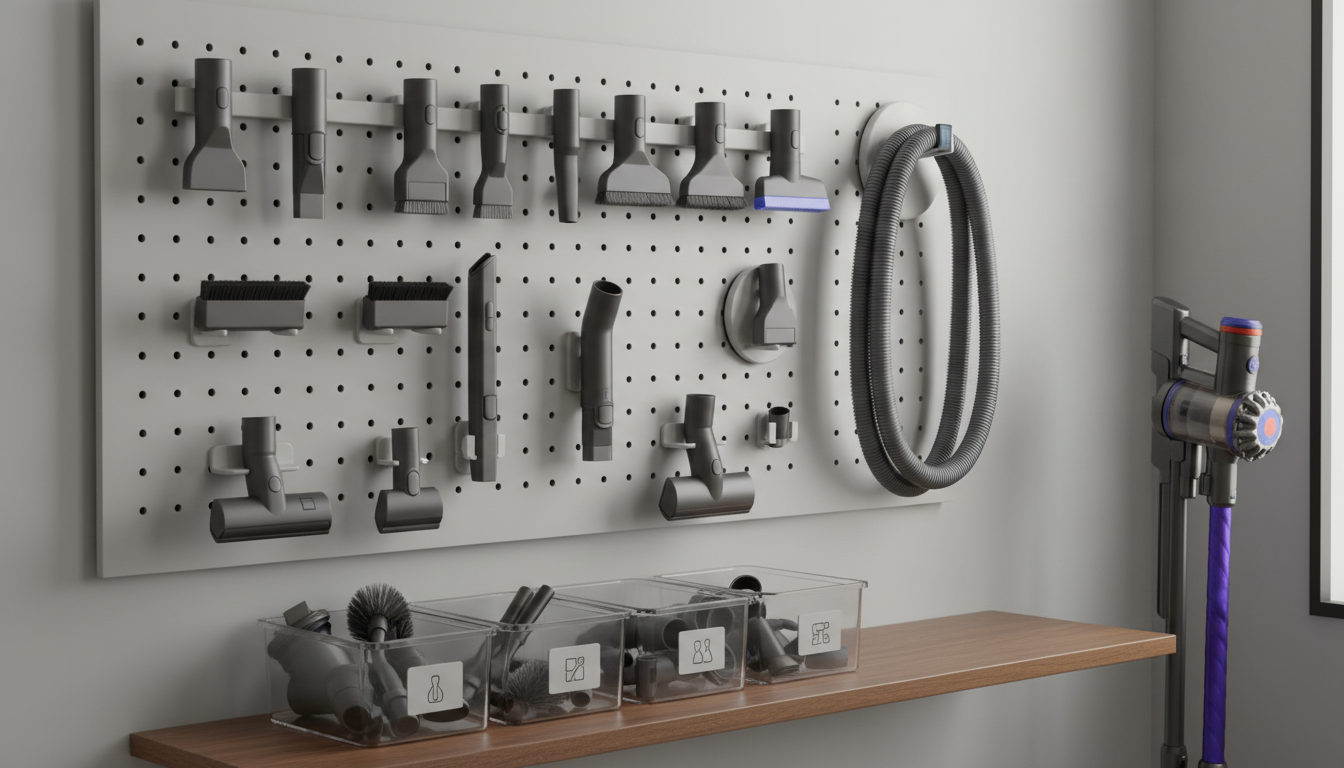
The Vertical Integration Strategy (Wall-Mounting)
This is the gold standard for store vacuum attachments methodology. By utilizing vertical space, you keep tools off the floor, visible, and easily reachable.
- Pegboards: A heavy-duty metal or wooden pegboard installed in a utility closet is the ultimate customizable solution. Use "J-hooks" or specialized vacuum tool holders to hang each attachment. The primary benefit here is visibility; you can see at a glance if a tool is missing.
- Dedicated Wall Brackets: Many third-party manufacturers create specific wall-mounted racks for brands like Dyson, Shark, or Miele. These often feature the same "click-lock" mechanism as the vacuum itself, ensuring the tools are held securely and won't fall if the door is slammed.
- PVC Pipe DIY: For a cost-effective, high-durability solution, cut small lengths of 1.5-inch or 2-inch PVC pipe (depending on your vacuum's diameter) and screw them onto a wooden board mounted to the wall. These "holsters" provide a perfect friction fit for most standard wand attachments.
The Mobile Caddy System (Point-of-Use Accessibility)
If you have a large home, the biggest hurdle is having the right tool when you are far away from the storage closet.
- Cleaning Aprons: Professional housekeepers often wear a lightweight tool belt or apron. Small brushes and crevice tools are kept in pockets, allowing for instant transitions between floor cleaning and detail work.
- The Rolling Caddy: A small, three-tier rolling cart can house your vacuum, its hose, and every single attachment. This "mobile command center" can be wheeled from room to room. This is particularly effective for "Shop-Vac" users who have bulky hoses and large floor nozzles.
- On-Wand Clips: If your vacuum didn't come with them, you can purchase universal "tool clips" that snap onto the main extension wand. This allows you to carry your two most-used tools (usually the crevice tool and the upholstery brush) directly on the machine.
The Modular Bin Approach (Categorized Containment)
For those who prefer a minimalist aesthetic where everything is hidden behind closed doors, bins are the answer—but they must be executed correctly.
- Clear Acrylic Bins: Never use opaque bins. Use clear, stackable containers so you can identify the contents without opening them.
- Drawer Dividers: If you have dedicated drawer space in a laundry room, use adjustable dividers. Group your tools by "Zone": Floor Tools, High-Reach Tools, and Delicate/Upholstery Tools.
- Labeling: Use a label maker to mark the "home" for each tool. This is crucial for households with multiple people; it ensures that whoever finishes the vacuuming knows exactly where the turbo-brush belongs.
Sizing and Compatibility Considerations
Before implementing a storage system, you must identify your vacuum’s "Diameter Standard." Most residential vacuums use a 1.25-inch (32mm) or 1.5-inch (38mm) connection. Shop-Vacs often use 2.5-inch connections. Ensure your storage hooks or PVC holsters are sized appropriately to prevent tools from slipping through or being wedged too tightly.

Vacuum Attachments Accessories 8 pcs,1 1/4 inch Vacuum Cleaner Tools Kit Vacuum Dusty Brush with Vac
- High-quality product
- Customer favorite
- Best value option
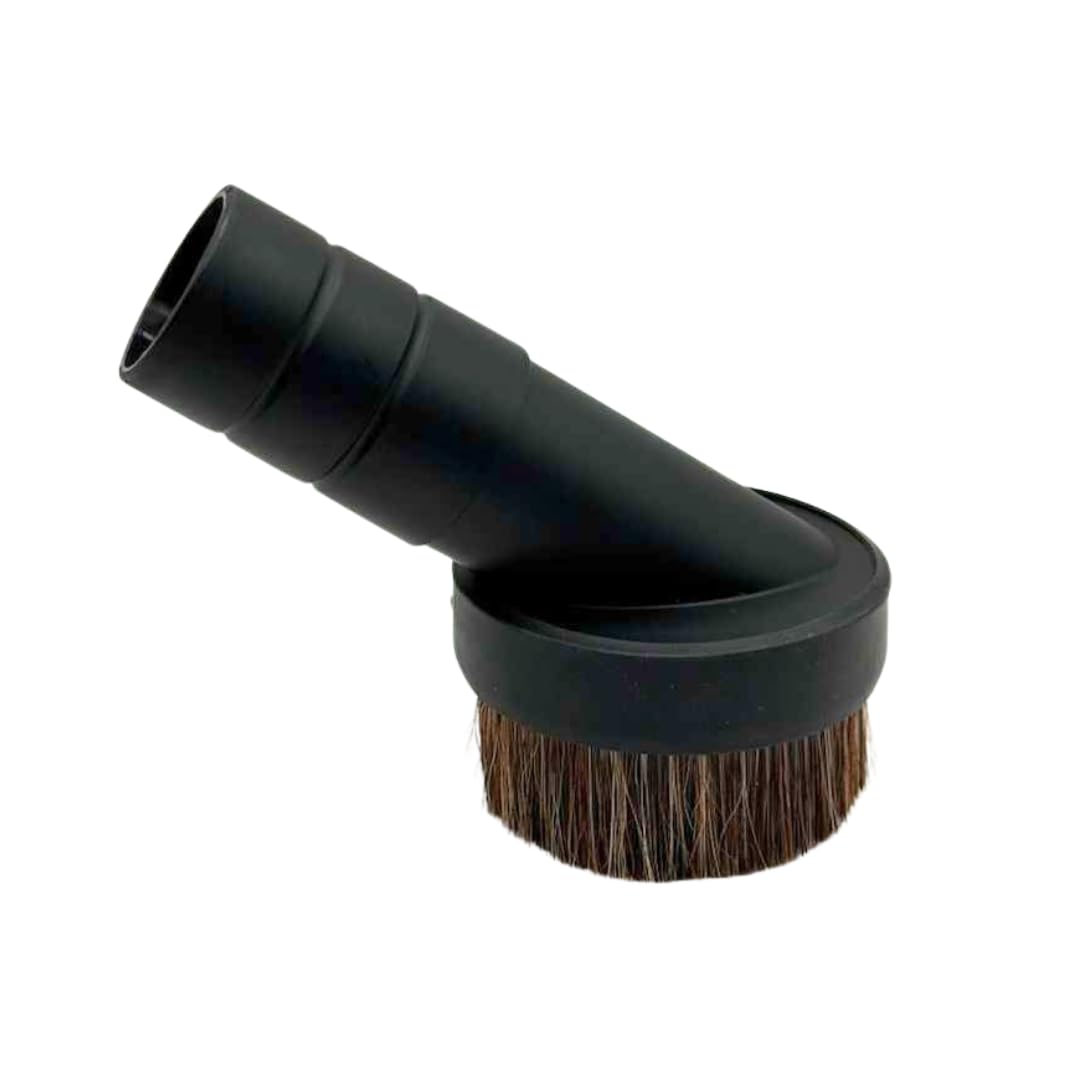
Brush Attachment Compatible with proteam Vacuum Parts and proteam Backpack Vacuum 1.5 inch 38mm – At
- High-quality product
- Customer favorite
- Best value option
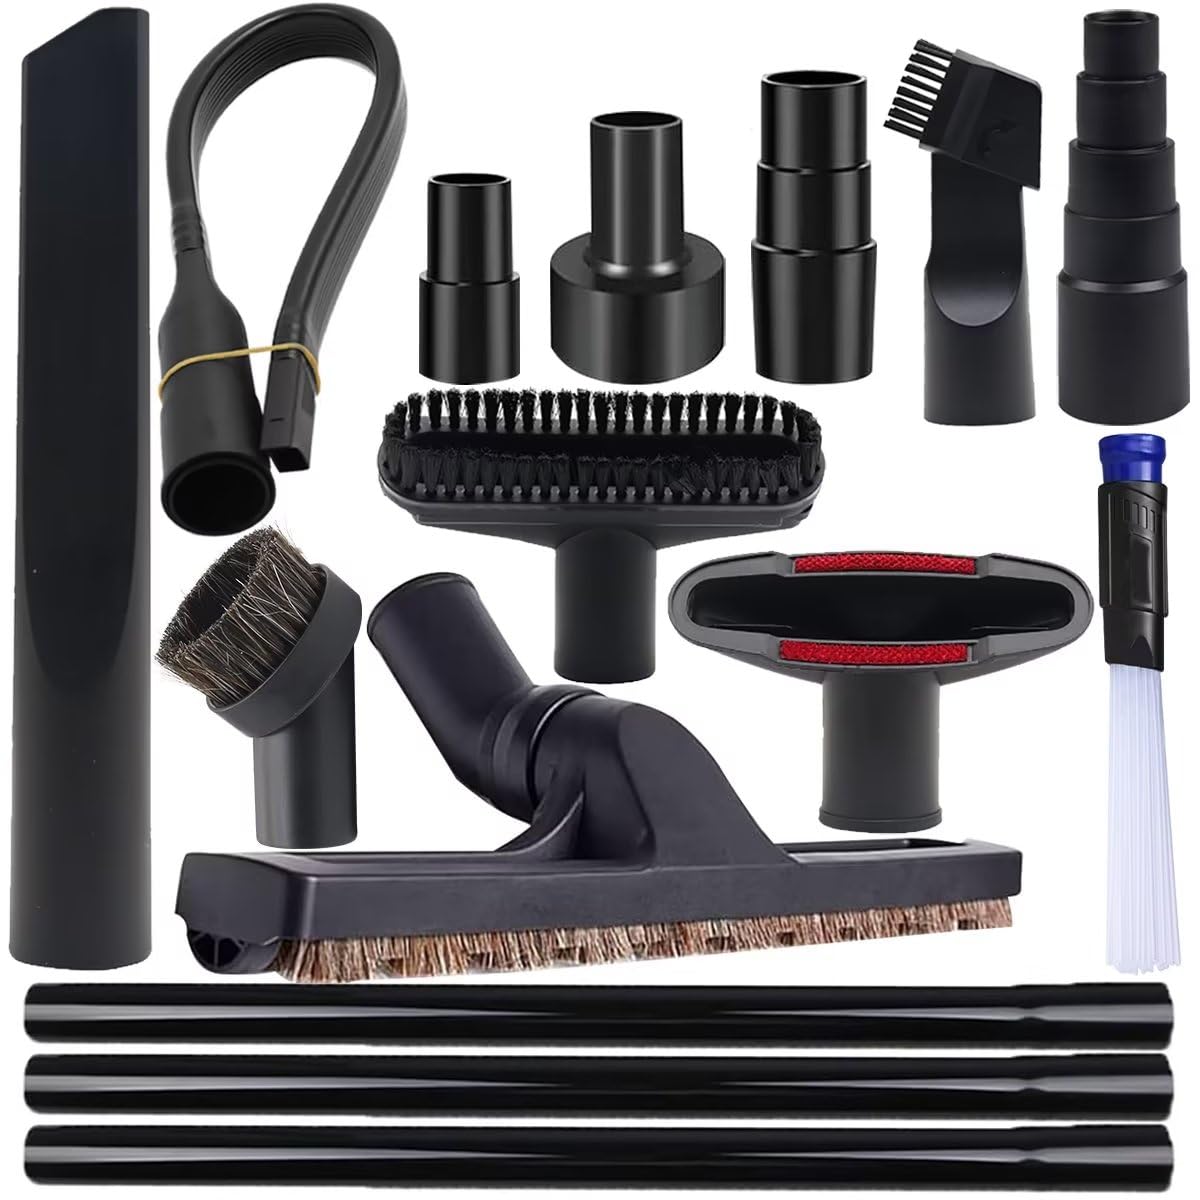
IN VACUUM 15 Pcs Universal Vacuum Attachments & Brushes for Shop Vac Accessories – 2 1/2" to 1 1/4"
- High-quality product
- Customer favorite
- Best value option
Expert Hacks & Maintenance: Preserving Your Toolkit
Once you have established your vacuum attachment storage system, you must maintain it. Organization is not a one-time event; it is a discipline. Here are advanced hacks to keep your tools in peak condition:
The "Clean-Before-Store" Rule
Never place a dirty attachment back into its storage slot. For brushes, use a fine-tooth comb to remove hair and lint from the bristles. For plastic nozzles, a quick wipe with a microfiber cloth prevents the buildup of "static dust"—the fine layer of dust that sticks to plastic through electrostatic charge. If you have been vacuuming moist areas, let the tool air-dry completely before placing it in a closed bin to prevent odor.
Magnetic Strips for Metal Wands
If you have stainless steel extension wands, an industrial-strength magnetic tool strip (the kind used for wrenches in garages) is a game-changer. It allows you to "slap" the wands onto the wall without fumbling with clips or brackets.
The "Over-the-Door" Shoe Organizer Hack
For a low-cost, high-efficiency solution, a clear plastic over-the-door shoe organizer is perfect for vacuum attachment storage. Each pocket can hold a different tool. The clear plastic allows for instant identification, and the vertical orientation saves precious floor space in small apartments.
Lubricating O-Rings
Many professional-grade vacuum attachments have rubber O-rings or gaskets to ensure a tight seal. Every six months, apply a tiny amount of silicone-based lubricant to these rings. This prevents them from drying out and cracking while in storage, ensuring your vacuum maintains 100% of its suction power.
Mega FAQ: Expert Answers to Common Storage Questions
1. Can I store vacuum attachments in an unheated garage?
It is not recommended. Extreme temperature fluctuations can cause the plastic to become brittle and crack. Additionally, humidity in a garage can lead to rust on any metal components or internal springs in motorized heads.
2. How do I store the long, awkward vacuum hose?
The best way to store vacuum attachments like hoses is a large-diameter "hose hanger" or a heavy-duty "U-hook" mounted high on a wall. Avoid tight loops, as these can cause "memory kinking" in the plastic, which restricts airflow.
3. What is the best way to organize tiny specialized detail kits?
Small kits (like those for computer keyboards) should be kept in their original case or a dedicated small electronics pouch that is then clipped to your main storage board.
4. How do I prevent pet hair from smelling in the storage bin?
If you store tools used for pet hair, place a small sachet of activated charcoal or a cedar block in the storage bin. This neutralizes odors without using synthetic perfumes.
5. Is it okay to stack attachments on top of each other?
No. Stacking leads to bristle deformation and makes it harder to find what you need. Aim for "single-layer" storage where every tool has its own dedicated footprint.
6. Should I store my motorized floor head on the vacuum or off?
If your vacuum is wall-mounted, storing it "on" is fine. If it's a canister vacuum, store the motorized head flat on a shelf to prevent the neck joint from being under constant tension.
7. How do I clean attachments before storing them?
Most non-motorized attachments can be washed in warm, soapy water. Ensure they are 100% dry (usually 24 hours of air drying) before you store vacuum attachments in an enclosed space.
8. What if my vacuum attachments don't fit standard wall mounts?
You can use "Universal Tool Grippers"—these are spring-loaded rubber rollers that can grip any cylindrical object regardless of its specific diameter or connector type.
9. How do I label my storage if I have multiple vacuums?
Use color-coded tape. Red for the Dyson tools, blue for the Shop-Vac tools. This prevents the frustration of trying to force a 32mm tool onto a 35mm wand.
10. Can I use a dishwasher to clean attachments?
Generally, no. The high heat of a dishwasher can warp the plastic. Stick to hand washing for anything you value.
11. How often should I audit my attachment storage?
Once every six months. Check for cracked plastic, splayed bristles, and tools you haven't used in a year. If you don't use it, consider storing it in a secondary location (like a basement bin) to keep your primary "cleaning command center" lean.
12. What is the most common mistake in vacuum attachment storage?
Storing tools too low. If you have to bend down to the floor to find a tool, you are less likely to use it. Store your most-used tools between waist and eye level.
Closing Thoughts: The ROI of Organization
Mastering how to store vacuum attachments is the ultimate "life hack" for home maintenance. It moves the needle from "cleaning as a chore" to "cleaning as a professional process." By investing a Saturday afternoon into setting up a vertical pegboard, a mobile caddy, or a modular bin system, you are reclaiming hours of your life and protecting an expensive appliance.
Remember: A vacuum cleaner is only a motor; the attachments are what actually do the work. Treat them with the same respect a master carpenter treats their chisels. Keep them visible, keep them clean, and keep them accessible. When your tools are ready, your home will be cleaner, your air will be fresher, and the "accessory abyss" will be a thing of the past. Establish your system today and experience the frictionless efficiency of a truly organized home.