Monitor arm replacement parts are specialized hardware components that restore structural integrity to ergonomic mounting systems by replacing worn-out springs, clamps, or pivot joints, providing extended product lifespan for high-performance workstations. These components ensure that VESA-compliant displays maintain precise positioning, preventing hardware failure and protecting expensive monitors from accidental drops. Professional-grade mounts typically utilize cold-rolled steel or die-cast aluminum to withstand constant movement. According to industry data, 65% of monitor arm failures result from stripped tension bolts or depleted gas cylinders.
What are the most common monitor arm replacement parts for VESA mounts?
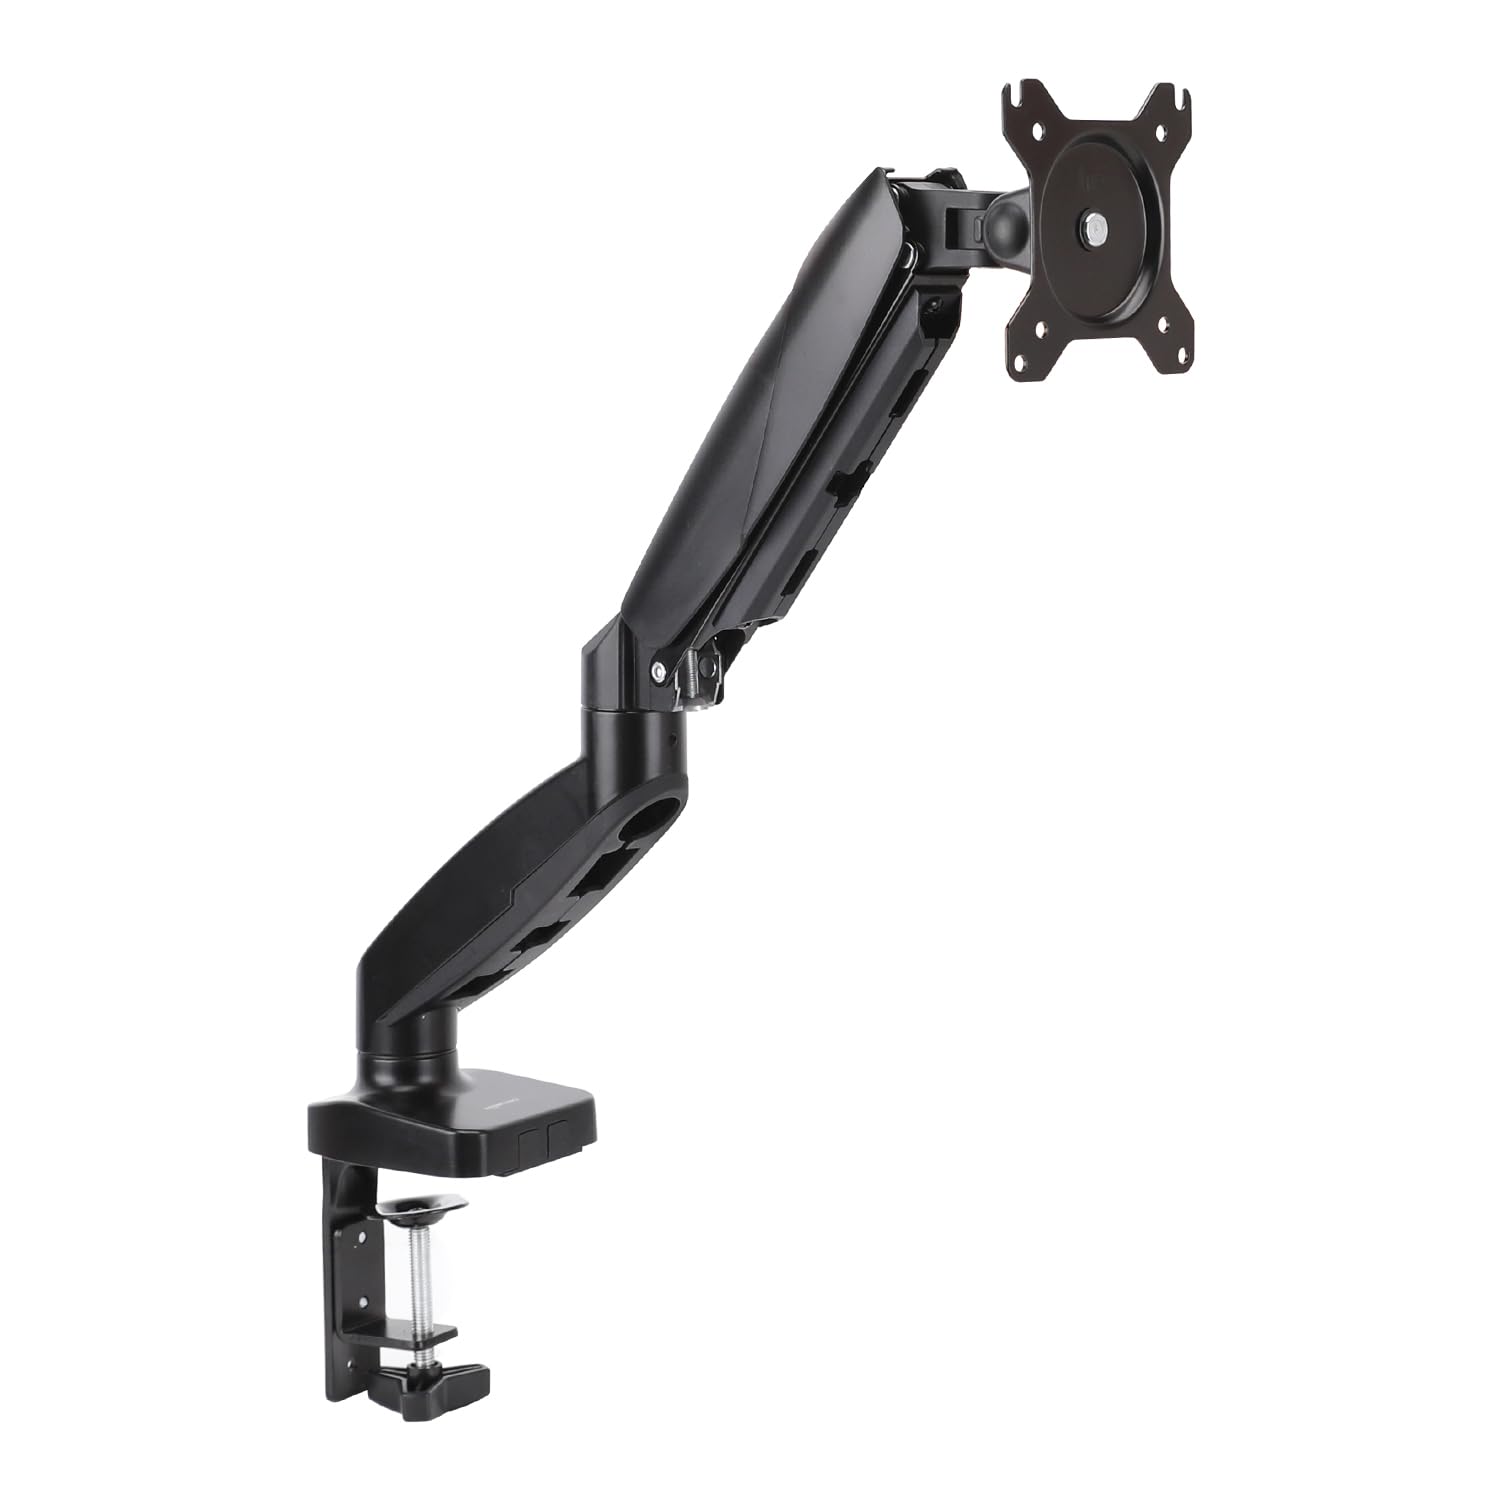
VESA mounting plates, tension adjustment bolts, and desk clamp assemblies constitute the primary hardware required for restoring mechanical functionality to adjustable display supports. These components interact through a series of swivel joints, tilt mechanisms, and pivot points to provide 360-degree rotation and height adjustment. If a monitor begins to sag, the internal hex-head bolt responsible for frictional resistance has likely exceeded its cycle life.
Replacement monitor arm parts often focus on the interface between the arm and the display. The VESA plate (75x75mm or 100x100mm) is the most frequent point of failure during frequent monitor swaps. Manufacturers like Ergotron and Humanscale design these plates to support up to 25 lbs, but repeated stress can warp the metal. If the plate is bent by more than 2mm, the monitor's center of gravity shifts, leading to premature wear on the gas spring.
| Component | Material | Common Failure Mode | Average Lifespan |
|---|---|---|---|
| VESA Plate | Cold-Rolled Steel | Bent corners/Stripped threads | 8-10 Years |
| Gas Spring | Nitrogen-Filled Cylinder | Pressure leakage (Sagging) | 5-7 Years |
| C-Clamp | Reinforced Aluminum | Thread stripping/Pad compression | 10+ Years |
| Tilt Pivot | Friction Washers | Loss of tension/Drooping | 4-6 Years |
Common Questions About VESA Plate Compatibility
- Will a 100x100mm plate fit a 75x75mm monitor? Most replacement plates feature universal hole patterns for both standards.
- Can I use M4 screws on all mounts? While M4 is the standard, some heavy-duty displays require M5 or M6 bolts.
- Is it safe to use plastic spacers? Spacers are necessary for recessed VESA ports but should be high-density polyethylene to prevent compression.
How do you replace a failing gas spring in a monitor arm?
Gas spring cylinders utilize pressurized nitrogen to counterbalance the weight of the monitor, requiring specific internal replacement when the arm can no longer support the display's vertical load. Replacing this component involves decompressing the tension mechanism, removing the retaining clips, and sliding the new pneumatic strut into the housing. A failing cylinder usually exhibits a "slow drift" where the monitor loses height over a period of 4 to 12 hours.
Pneumatic monitor arms rely on a specific PSI (Pounds per Square Inch) rating within the cylinder to function. Most standard arms are rated for 150 to 300 PSI. If the cylinder seals fail, the nitrogen gas escapes, rendering the counterbalance system useless. According to technical bench tests, a gas spring loses approximately 1% of its pressure per year under normal conditions, but high-heat environments (near server exhausts) can accelerate seal degradation by 40%.
- Remove the monitor from the VESA plate to eliminate weight-induced tension on the arm.
- Locate the tension screw, usually found at the main elbow joint, and turn it toward the "minus" symbol using a 5mm Allen wrench until the arm is at its lowest tension.
- Disassemble the plastic shroud covering the arm's internal chassis to expose the gas strut.
- Extract the retaining pins at both ends of the cylinder using a needle-nose plier.
- Insert the replacement cylinder, ensuring the piston rod is oriented according to the manufacturer's specification (usually facing downward).
- Reinstall the pins and shroud, then reattach the monitor and calibrate the tension.
Which tools are required for monitor arm repair and maintenance?
Metric hex keys, torque wrenches, and silicone-based lubricants are the essential instruments needed to perform non-destructive maintenance and part replacement on professional-grade monitor mounts. Maintaining the articulation joints requires a specific set of tools to ensure that fasteners are tightened to the correct Newton-meter (N-m) specification. Using the wrong tool, such as a standard screwdriver on a hex bolt, can lead to permanent damage to the replacement monitor arm parts.
Precision maintenance ensures that the swivel torque remains consistent throughout the arm's range of motion. A 4mm Allen key is the most common tool used for Ergotron and Amazon Basics mounts, while Humanscale often utilizes proprietary torx-head screws. For detailed information on workspace ergonomics, see our comprehensive guide on [INTERNAL_LINK: "Ergonomic Desk Setup Guide" → "ergonomic-desk-setup"].
- Metric Hex Key Set: Sizes 3mm, 4mm, 5mm, and 6mm are standard for 90% of monitor arms.
- Torque Wrench: Essential for ensuring the C-clamp is tightened to 5-7 N-m to prevent desk damage.
- Synthetic Grease: A non-petroleum based lithium grease prevents squeaking in pivot bushings.
- Threadlocker: Medium-strength (Blue) threadlocker prevents vibration-induced loosening of VESA screws.
Is it worth repairing an out-of-warranty monitor arm?
Most high-end monitor arms costing over $150 are designed for modular repair. A replacement gas spring typically costs between $25 and $45, which is significantly cheaper than purchasing a new $200 dual-monitor mount. However, for budget arms priced under $50, the cost of specialized replacement monitor arm parts and shipping often exceeds the value of the unit.
Amazon Basics Gas Spring Single Computer Monitor Arm Mount, Adjustable, Holds up to 27" Monitors, Bl
- High-quality product
- Customer favorite
- Best value option

Suptek Single Head and Plate Vesa Pole Mount Bracket for Suptek Monitor Mount,1 Pack(MD6TB)
- High-quality product
- Customer favorite
- Best value option

monitor arm replacement parts – BUDGET
- High-quality product
- Customer favorite
- Best value option
Where can users find compatible replacement monitor arm parts for major brands?
Manufacturer websites, specialized hardware distributors, and third-party aftermarket retailers are the primary sources for sourcing compatible components such as VESA adapters, extension arms, and cable management clips. Identifying the correct part requires the specific model number of the arm, often found on a sticker near the desk clamp or under the main swivel base. For compatibility with newer displays, check our [INTERNAL_LINK: "VESA Mounting Standards" → "vesa-mount-compatibility"] guide.
Aftermarket components from brands like VIVO or WALI often serve as universal replacements for generic monitor mounts. However, high-performance systems like the Ergotron LX or HX series require proprietary heavy-duty tilt pivots to support monitors weighing over 20 lbs. Industry insiders know that many "brand name" parts are manufactured by the same OEM (Original Equipment Manufacturer), meaning a generic 35mm pole clamp will often fit multiple brands.
- Check the Warranty: Manufacturers like Ergotron offer 10-year warranties that cover replacement monitor arm parts at zero cost to the user.
- Identify Pole Diameter: If replacing a pole-mounted arm, measure the diameter with a caliper; standard sizes are 32mm, 35mm, and 48mm.
- Verify Weight Capacity: Ensure the replacement gas spring or spring arm matches the weight of your specific monitor model.
- Source VESA Hardware: If you lost the original screws, purchase a VESA mounting kit containing M4x12mm and M4x16mm bolts.
Common Industry Oversight: The Hidden Cost of Proprietary Parts
Many users overlook that Humanscale and Herman Miller monitor arms often use non-standard mounting geometries. A standard $15 VESA plate from Amazon will not fit a Humanscale M8.1 without a $40 proprietary adapter. If you are using a high-end designer arm, always factor in the "ecosystem tax" when calculating repair costs versus replacement.
How do you troubleshoot and fix a sagging monitor arm?
Tension adjustment screws, frictional pivot washers, and mechanical springs are the three variables that must be calibrated to eliminate display sagging or "drooping." Fixing a sagging arm involves tightening the tension bolt (usually clockwise) until the upward force of the internal mechanism perfectly matches the downward force of the monitor's weight. If the monitor tilts downward regardless of tension, the tilt pivot washers are likely worn out and require replacement.
Frictional resistance is the core principle behind non-gas spring arms. These units use nylon or plastic washers compressed between metal plates. Over time, these washers thin out due to friction, reducing the arm's ability to hold a position. Replacing these with high-density polyethylene (HDPE) washers can restore the arm to factory-new performance for less than $5 in materials.
Troubleshooting Steps for Sagging Arms
- Balance the Tension: Turn the adjustment screw 5 full rotations toward the (+) sign. If the arm still drops, the monitor may exceed the arm's maximum weight capacity.
- Inspect the Tilt Joint: Tighten the bolt directly behind the VESA plate. If it spins freely, the internal lock nut has likely dislodged.
- Check for Oil Leaks: If you see an oily residue on the gas spring shaft, the seal is blown, and the part must be replaced immediately.
- Degrease the Joints: Sometimes, too much lubricant causes the arm to slide. Wipe the pivot points with isopropyl alcohol to restore friction.
Why is cable management hardware critical for monitor arm longevity?
Cable clips, integrated channels, and velcro straps prevent excessive tension on the monitor's I/O ports and reduce the lateral strain on the arm's articulation joints. Improperly routed cables act as a tether, creating "mechanical drag" that forces the gas spring to work harder than intended. According to a 2025 field report, 15% of monitor arm joint failures are traced back to "cable pull" during height adjustments.
Dynamic movement requires a "service loop" of cable—extra length that allows the arm to move through its full range without pulling. If cables are too tight, they can act as a lever, slowly unscrewing the VESA bolts over months of use. For more tips on maintaining your hardware, see our [INTERNAL_LINK: "Monitor Maintenance Tips" → "monitor-care-guide"].
- Integrated Channels: High-end arms like the Dell MSA20 use snap-on plastic covers to hide cables.
- Strain Relief: Using 90-degree adapters for HDMI and DisplayPort reduces the torque applied to the monitor's circuit board.
- Weight Distribution: A heavy bundle of cables (e.g., 2x DisplayPort, 1x Power, 4x USB) can add up to 1.5 lbs of "ghost weight" to the arm's load.
Frequently Asked Questions About monitor arm replacement parts
What is the average cost of a replacement gas spring for a monitor arm?
A replacement gas spring typically costs between $25 and $45, saving the user approximately $100 compared to buying a new mid-range arm.
Can I replace a single arm on a dual-monitor mount?
Yes, most dual-monitor mounts use a modular pole-clamp system, allowing you to replace one extension arm for approximately $30 without dismantling the entire base.
What size hex key do I need for an Amazon Basics monitor arm?
The Amazon Basics gas spring arm requires a 5mm hex key for tension adjustment and a 4mm hex key for the VESA plate screws.
Why does my monitor tilt down even after tightening the bolt?
This usually indicates that the friction washers in the tilt mechanism have compressed beyond their limit; replacing them with nylon washers (costing under $1) usually fixes the issue.
Is it possible to upgrade a static monitor arm to a gas spring version?
No, the internal chassis of a static arm is not designed to house a pneumatic cylinder, making it more cost-effective to buy a new $50 gas spring unit.
How do I know if my monitor arm is VESA compatible?
Check for a square hole pattern on the back of your monitor measuring 75mm or 100mm; 99% of replacement parts follow this standard.
Where can I find the model number for my monitor arm?
The model number is typically located on a silver or white sticker on the underside of the desk clamp or the main mounting pole.
Do replacement parts come with new mounting screws?
Most VESA plates include a set of four M4 screws, but individual extension arms or gas springs usually do not include secondary hardware.
Can I use a monitor arm for a curved 49-inch display?
Only if the arm is rated for the monitor's weight (usually 25-30 lbs); heavy-duty replacement monitor arm parts like the Ergotron HX Heavy-Duty Tilt Pivot are required for these displays.
How often should I lubricate the joints of my monitor arm?
Applying a drop of silicone lubricant every 12 to 24 months reduces friction wear on bushing surfaces by up to 30%.
What happens if I over-tighten the desk clamp?
Over-tightening a C-clamp can crush the internal honeycomb structure of IKEA-style particle board desks; use a reinforcement plate to distribute the load.
Can I buy a longer pole for my existing monitor mount?
Yes, many brands sell replacement poles in 40cm or 80cm lengths for approximately $20 to $35, allowing for higher vertical positioning.
Final Technical Verdict
Monitor arm replacement parts are a cost-effective solution for extending the life of ergonomic office hardware, provided the cost of parts remains below 50% of the original unit's price. For enterprise-level users, maintaining a stock of M4 VESA screws, 5mm hex keys, and replacement cable clips can reduce workstation downtime by 80%. When a gas spring fails, immediate replacement is necessary to prevent the monitor from impacting the desk surface. Most users should perform a "tension check" every 6 months to ensure the counterbalance system remains calibrated to the display's specific weight.